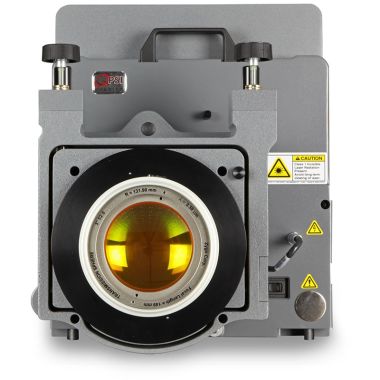
SYSTEM CHARACTERISTICS
- Designed specifically for measuring the surface topography and transparent film thickness of rotationally symmetric samples such as diamond-turned optical surfaces and moulded or polished aspheric lenses.
- Two size options: RPS-150 for Ф ≤ 150 mm samples and RPS-300 for Ф ≤ 300 mm samples
- Non-contact, high-resolution, high-speed chromatic confocal point sensor with three available probe resolutions
- Integrated high-precision centration/tilt table with adjustable piezo lever probe for fast and easy sample/chuck/fixture alignment
- Nanometer encoded C/R/Z (rotational, radial, vertical) motion with direct drive rotary air bearing (C-axis) and direct drive linear mechanical bearing (R- & Z-axis)
- Granite base with dimensionally stable Invar metrology frame
- Available vacuum bell chucks for secure sample holding
- Nanometer precision motion control with thermal compensation and error mapped Invar encoder gating scales
- User-friendly QuickPRO™ instrument control and data acquisition software permits easy set-up and optimized measurement sampling density for best coverage at highest throughput
- Powerful CalcuSurf-3D™ surface plotting, form fitting and data reporting software
| SYSTEM | RPS-150 | RPS-300 |
| Dimensions {L : W : H) | 500 mm : 600 mm : 700 mm | 850 mm: 750 mm: 1450 mm |
| Weight | Approx. 60 kg | Approx. 350 kg |
System Controller |
Includes 3-axis motion control, sensor control, power supplies, ethernet interface to PC | |
| Power Requirements | 110-220V AC, 50-60 Hz, 1 phase, 2 amps {220V), 5 amps {110V) | |
| Compressed Air Requirements | 114 liters/minute (2 CFM) @ 550 kPa {80 PSI) | |
| MOTION | RPS-150 | RPS-300 |
| Stage Travel {C : R : Z) | 360°: 75 mm : 50 mm | 360°: 150 mm : 50 mm |
| Encoder Resolution {C : R : Z) | 20 nm : 20 nm : 5 nm | 20 nm : 20 nm : 5 nm |
| Load Capacity | 50 kg | 200 kg |
| Drive Type | C: 3-phase ironless rotary, R & Z: 3-phase ironless linear | |
| Bearing Type | C: air bearing, R & Z: cross-roller bearing | |
| C-axis Eccentricity/Wobble | Radial/Axial: 50 nm, Angular {Coning): 0.206 arc sec | |
| R- & Z-axis Flatness/Straightness | Approx. 1 µm / 100 mm | |
| SENSOR | |||||
| Technique | Single Point Chromatic Confocal | ||||
| Applications | Surface Distance & Thickness | ||||
| Sampling | 4000 points/sec | ||||
| Available Probes | 0.5 mm | 1mm | 4mm | ||
| Measuring Range | 0.5 mm | 1mm | 4mm | ||
| Lateral Resolution | 2µm | 2.5 µm | 4µm | ||
| Working Distance | 11mm | 16mm | 37mm | ||
| Axial Resolution | 10 nm | 40nm | 160nm | ||
| Axial Linearity | 150 nm | 400nm | 1.6µm | ||
| Maximum Slope | ±50° | ±30° | ±15° | ||
| Thickness Measuring Range | ≤0.75mm | ≤l.5mm | ≤6mm | ||
Write Your Own Review


